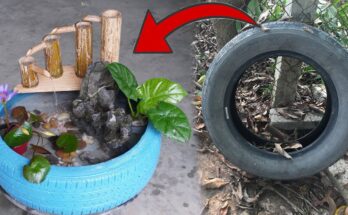
Creating a diorama aquarium is an incredibly fun and imaginative project, blending the natural beauty of aquatic life with artistic craftsmanship. While most aquariums focus on just water and fish, a diorama aquarium takes it to another level by incorporating detailed, miniature landscapes or scenes inside the tank. And the secret ingredient? Cement! This versatile material can be used to craft realistic underwater structures, stunning decorations, and unique features for your diorama aquarium, all while adding a sense of depth and artistry.
In this guide, we’ll walk you through the steps to build an amazing diorama aquarium using cement, from conceptualization to finishing touches.
Materials You’ll Need
- Cement or quick-setting concrete mix
- Water
- Plastic container or aquarium tank
- Sand and gravel for texture
- Silicone adhesive or aquarium-safe sealant
- Paints (acrylic or waterproof)
- Mold for shaping concrete (such as plastic molds, foam, or plastic containers)
- Decorations (e.g., miniature plants, rocks, shells)
- Small fish-safe figurines (optional)
- Protective gloves and mask for handling cement
Step-by-Step Guide to Creating a Cement Diorama Aquarium
1. Plan Your Design
Before you start working with cement, it’s essential to design your diorama scene. Consider the following:
- Theme: Will it be a natural underwater world with rocks and plants, or do you prefer a more imaginative scene, like a sunken city or a forested grotto?
- Size: The size of your aquarium and the amount of space you have for your diorama will affect how large or small your concrete structures should be.
- Depth: Plan for layering the cement to create depth within your aquarium. This will help you create the illusion of an underwater world rather than just a flat design.
Sketch out your ideas, and make sure to include any miniature figures or plants you wish to place in the tank.
2. Prepare the Cement
Mix the cement according to the manufacturer’s instructions. Be sure to wear gloves and a mask to avoid inhaling dust. You can adjust the consistency depending on the project – a thicker mix will allow for more detailed sculptures, while a thinner one may work better for a smooth surface or layered texture.
3. Create the Base Structure
Use a plastic container or your aquarium tank as the base of your diorama. If you’re working with a plastic mold for your cement, line it with a plastic bag for easy removal once the cement sets. Begin by spreading a thin layer of sand or gravel at the bottom of your tank to create a natural-looking substrate.
Now, start forming the main structure with the cement mix. For example, you can mold a rocky formation or a sunken shipwreck by hand or use molds for more intricate designs. You can create ledges, caves, or archways for the fish to swim around or for visual interest. Allow the cement to set for several hours or as per the instructions on the cement bag.
4. Detail the Diorama
Once the main structures are in place, you can add finer details. Use smaller amounts of cement to create miniature plants, textured rocks, or sculptures. Cement can be molded and shaped into anything from coral reefs to ancient ruins. If you wish, you can also add small, fish-safe figurines like divers, treasure chests, or sea creatures to complete your diorama.
For a more realistic effect, paint your cement creations once they’re fully dried. Use waterproof paints or acrylic paints for a natural look. For example, greens and browns will make excellent seaweed or moss, while greys and browns work for realistic rocks or ruins. Be sure to let the paint dry completely before adding water to your aquarium.
5. Assemble the Aquarium
Place your cement diorama structures into the aquarium. Use silicone adhesive or aquarium-safe sealant to fix them in place and prevent them from shifting once the aquarium is filled with water.
After the cement structures are secured, fill the tank with water, being cautious not to disturb the diorama. Add your choice of aquatic plants, gravel, and water.
6. Final Touches
Consider adding lighting to your aquarium to enhance the diorama’s aesthetic appeal. LED lights can cast dramatic shadows, highlighting the features of your cement creations.
You can also introduce live or artificial fish to complete the living scene in your diorama aquarium.
Benefits of Cement in a Diorama Aquarium
- Durability: Cement is a sturdy and long-lasting material, ensuring your diorama structures stay intact for years.
- Customization: Cement allows you to create intricate, custom designs that plastic or glass ornaments simply can’t replicate.
- Eco-Friendly: Cement is a sustainable material when used correctly and minimizes waste compared to buying pre-made plastic decorations.
Conclusion
Building a diorama aquarium using cement is a creative and rewarding project that adds both beauty and functionality to your home or office. With a little planning, patience, and artistic flair, you can create a stunning underwater world where art and nature collide. From rocky caves to colorful sea plants, cement provides a versatile canvas for your imagination to run wild. So, gather your materials, and start crafting your own aquatic masterpiece today!